Microsoft Teams integration
Microsoft Teams is a collaboration platform that integrates with Office 365.
There are two ways to build interactions between Microsoft Teams and Windmill: run code on Windmill by a Microsoft Teams command or use the Microsoft Teams API directly from Windmill. In this guide, we'll cover both approaches.
Action on Windmill from MicrosoftTeams
The goal here is to be able to invoke a Windmill Script from Microsoft Teams, by using
/windmill command.
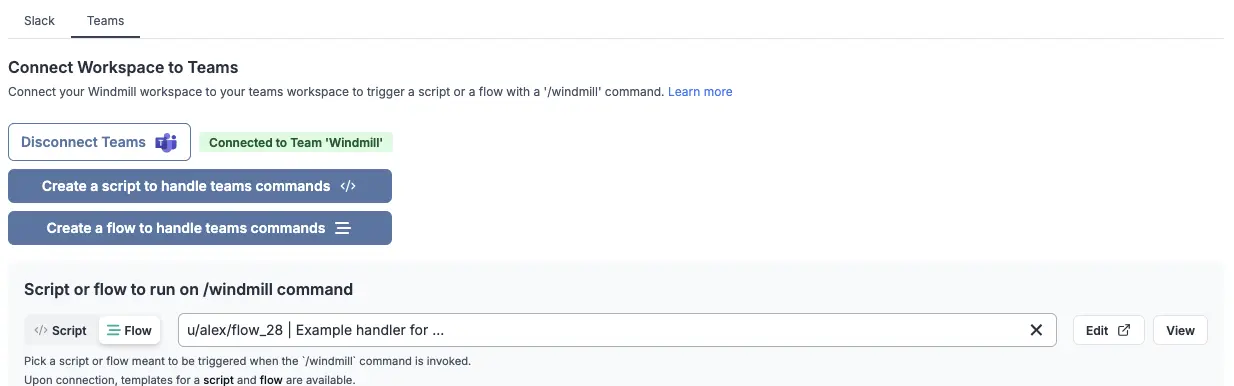
First, you need to be a workspace admin. Then you should go to Workspace Settings Page and select the "Slack / Teams" tab. On there, click "Connect to Microsoft Teams".
The Microsoft Teams integration is done through OAuth. On self-hosted instances, integrating an OAuth API will require Setup OAuth and SSO.
Note that you can connect multiple Windmill workspaces to the same Teams bot. Only one Windmill workspace can accept the /windmill commands from a given Teams "Team".
Using commands on Teams
Once you connected your workspace to a Teams Team, you can either select an existing script or flow to handle the /windmill command, or create a new one by clicking the "Create a script to handle teams command" button.
You will be navigated to the Script editor. Give your script a name
(e.g. teams_command_handler), a short summary (e.g. "Teams command handler"). You'll get to this template:
import * as wmill from "windmill-client"
export async function main(
activity_id: string,
command: string,
from_name: string,
team_id: string,
teams_message: any
) {
// Your business logic
const res = "task completed successfully!"
// (optional) Send update to Teams channel about completion of job
await wmill.TeamsService.sendMessageToConversation(
{
requestBody: {
conversation_id: activity_id,
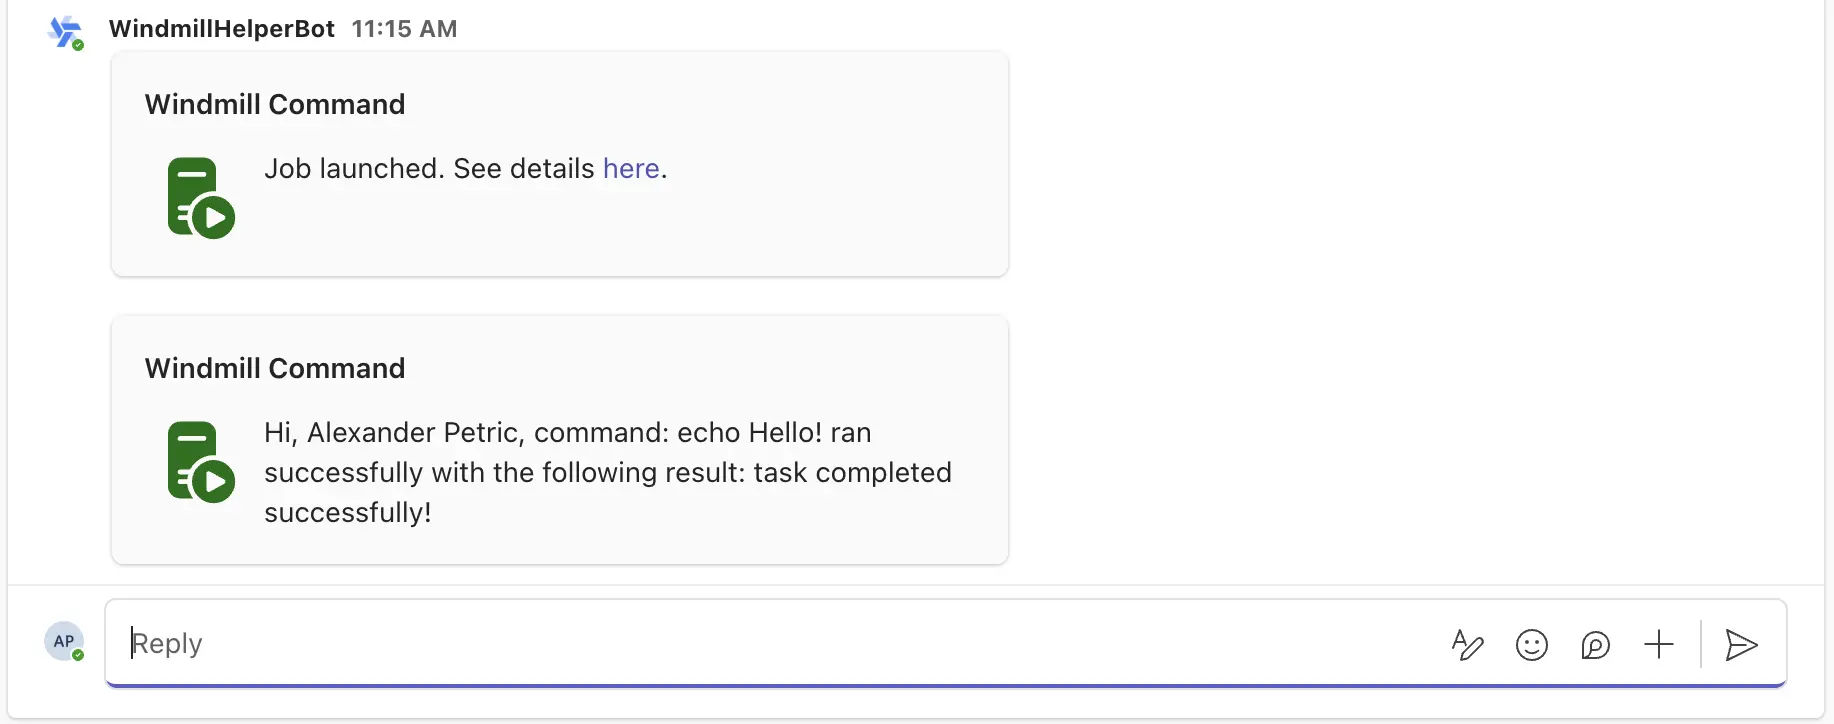
success: true,
text: `Hi, ${from_name}, command: ${command} ran successfully with the following result: ${res}`
}
}
)
}
After the Script is deployed, navigate back to the
Teams settings
Choose the "Script" option for adding a command handler and select your newly created Script.
Congratulations! You've just created a Teams command handler. Now you can use
the /windmill command in your Teams workspace to trigger the Script.
In addition to activity_id, the script/flow can use the following parameters, simply by having them as inputs with the proper name:
# the ID of the activity in the Teams conversation
activity_id

# the command that was triggered
command

# the name of the user who triggered the command
from_name

# Microsoft Teams Team ID
team_id

# the original payload from the Teams backend
teams_message
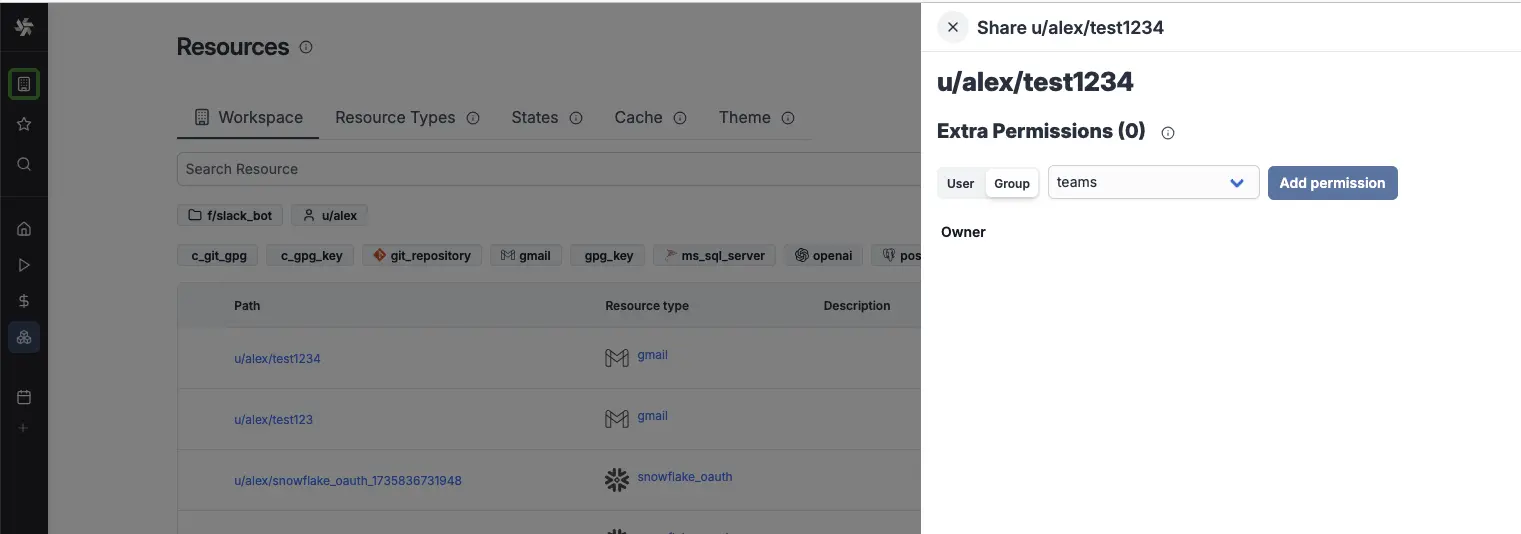
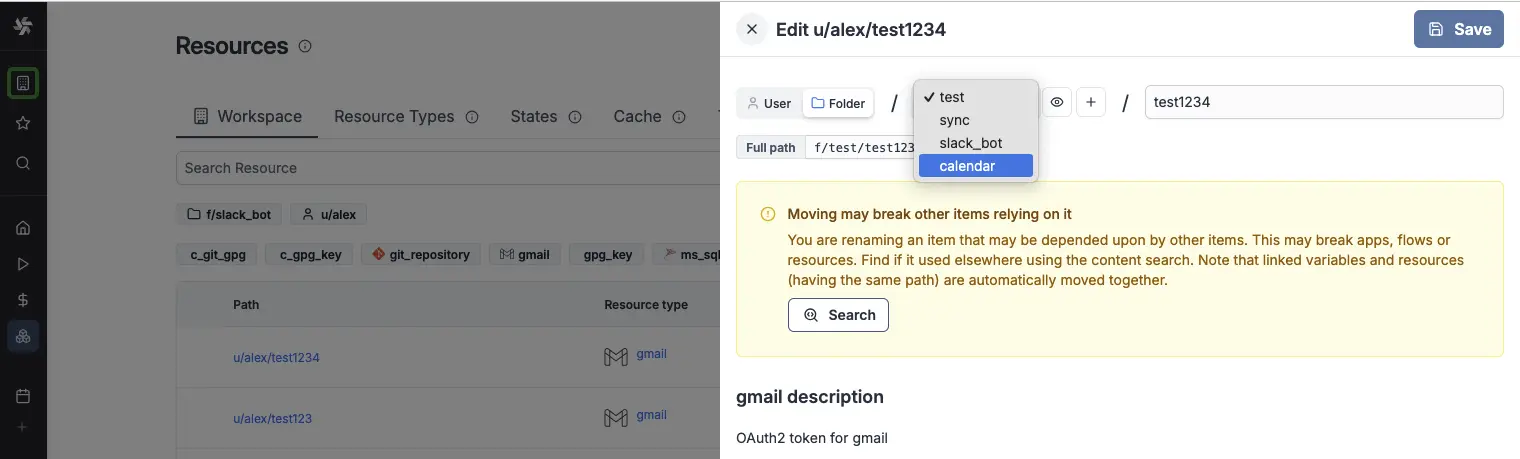
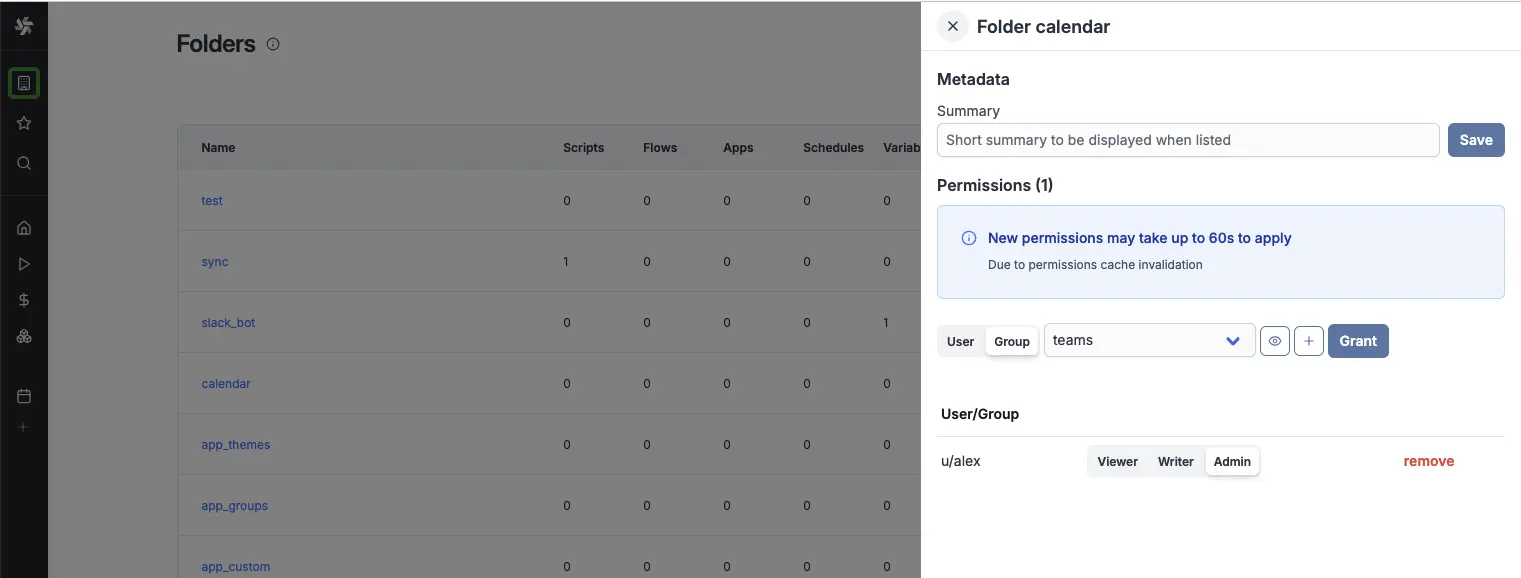
You won't be able to have Teams interact with your resources and variables before adding them to the teams group that was automatically created by Windmill after you set up your Teams workspace on Windmill.
How to let Teams use your resources and variables:
Handle multiple commands
You can extend your workspace script to handle complex commands coming from Teams messages. This article shows how to manage multiple commands & human-in-the-loop steps for a slackbot using branches, a text parser and approval steps and can be easily adapted to Teams.
Monitor who ran the command
You can see who ran the /windmill command by going to the
Runs page
on Windmill. The runs will be permissioned through the g/teams global group.
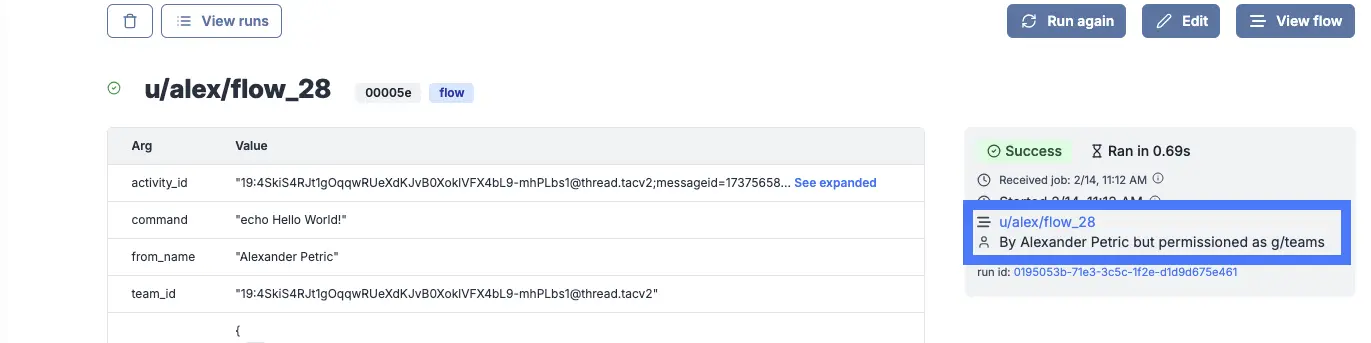
One of the parameters passed to the script is the "from_name" parameter, which is the name of the user who triggered the command. To process further teams specific details from the command, you can use the "teams_message" parameter.
## Example of teams_message payload
{
  "id": "1739549535827",
  "from": {
    "id": "29:152-adq1512TRGdQmxTqdgnfTA",
    "name": "Alexander Petric"
  },
  "text": "<at>WindmillHelperBot</at>. /windmill echo Hello World!",
  "type": "message",
  "locale": "en-US",
  "entities": [
    {
      "text": "<at>WindmillHelperBot</at>",
      "type": "mention",
      "mentioned": {
        "id": "28:0eba9472-83d1-429e-ba2c-1c2993dda84d",
        "name": "WindmillHelperBot"
      }
    },
    {
      "type": "clientInfo",
      "locale": "en-US",
      "country": "US",
      "platform": "Mac",
      "timezone": "America/New_York"
    }
  ],
  "recipient": {
    "id": "28:0eba9472-83d1-429e-ba2c-1c2993dda84d",
    "name": "WindmillHelperBot"
  },
  "timestamp": "2025-02-14T16:12:15.857639Z",
  "serviceUrl": "https://smba.trafficmanager.net/amer/508f04d5-b0de-4661-b035-b90bb6911ce7/",
  "attachments": [
    {
      "content": "<p><span itemtype=\"http://schema.skype.com/Mention\" itemscope=\"\" itemid=\"0\">WindmillHelperBot</span>. /windmill echo Hello World!</p>"
    }
  ],
  "channelData": {
    "team": {
      "id": "19:4SkiS4RJt1gOqqwRUeYdKJvB0XoklVFX4bL9-mhPLbs1@thread.tacv2"
    },
    "tenant": {
      "id": "508f04d5-b0de-4661-b035-b90bb6911ce7"
    },
    "channel": {
      "id": "19:4SkiS4RJt1gOqqwRUeXdKJvB0XoklVFX4bL9-mhPLbs1@thread.tacv2"
    },
    "teamsTeamId": "19:4SkiS4RJt1gOqqwRUeXdKJvB0XoklVFX4bL9-mhPLbs1@thread.tacv2"
  },
  "conversation": {
    "id": "19:4SkiS4RJt1gOqqwRUeXdKJvB0XoklVFX4bL9-mhPLbs1@thread.tacv2;messageid=1737565847488"
  }
}
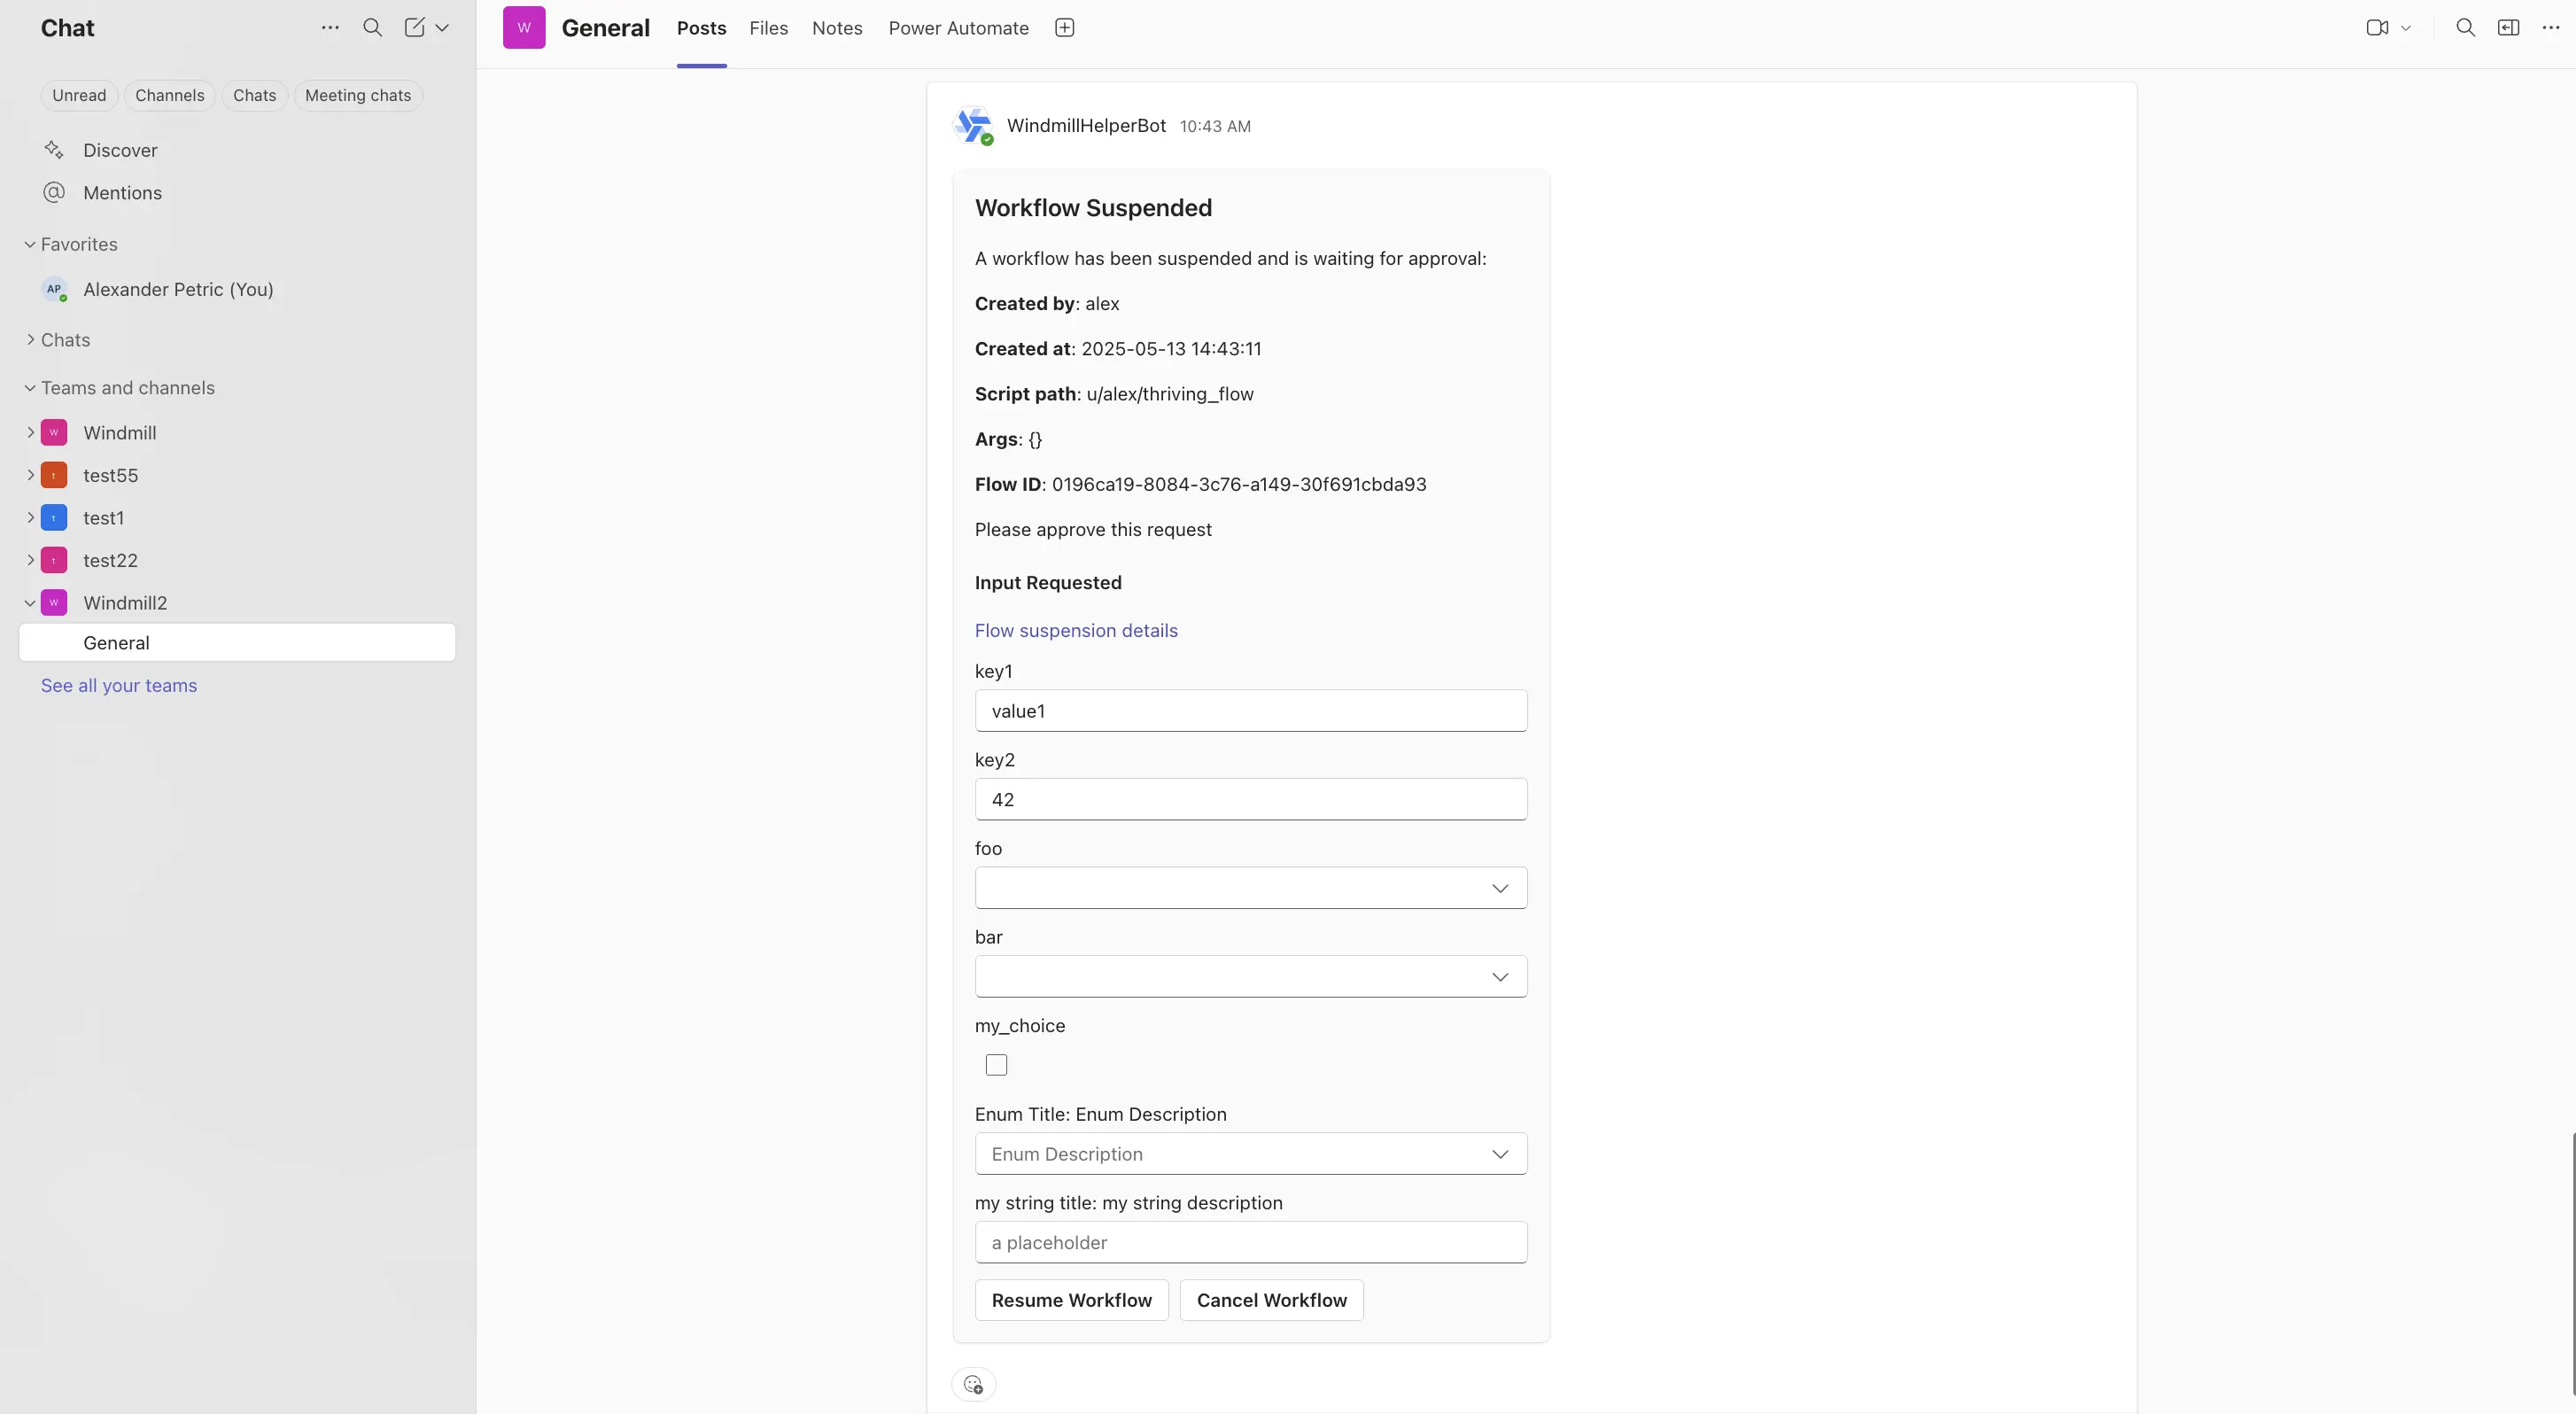
Teams approval steps
Approval steps are a way to suspend a flow until specific event(s) are received, such as approvals or cancellations. You can use them to handle approvals from Microsoft Teams.
The Windmill TypeScript client exposes helper functions to request approvals on Microsoft Teams. There are two types of approvals:
- Interactive approval: A Teams message that can be approved or rejected directly from Teams without having to go back to the Windmill UI
- Basic approval: A simple link that will open the approval page in the Windmill UI in your browser
The following hub scripts can be used:
If you define a form on the approval step, the form will be displayed in the Teams message as a modal.
Both of these scripts are using the Windmill client helper function:
- TypeScript Interactive
- TypeScript Basic
await wmill.requestInteractiveTeamsApproval({
    teamName: "Windmill",
    channelName: "General",
    message: "Please approve this request",
    approver: "approver123",
    defaultArgsJson: { key1: "value1", key2: 42 },
    dynamicEnumsJson: { foo: ["choice1", "choice2"], bar: ["optionA", "optionB"] },
});
const card_block = {
    "type": "message",
    "attachments": [
        {
            "contentType": "application/vnd.microsoft.card.adaptive",
            "content": {
                "type": "AdaptiveCard",
                "$schema": "https://adaptivecards.io/schemas/adaptive-card.json",
                "version": "1.6",
                "body": [
                    ... // card body
                ],
            },
        }
    ],
    "conversation": {"id": `${conversation_id}`},
}

await wmill.TeamsService.sendMessageToConversation({
    requestBody: { conversation_id, text: "A workflow has been suspended and is waiting for approval!", card_block }
})
Where dynamic_enums can be used to dynamically set the options of enum form arguments and default_args can be used to dynamically set the default values of form arguments.
If multiple approvals are required, you can use the client helper directly and send approval requests to different channels:
import * as wmill from "windmill-client"

export async function main() {
  // Send approval request to team A
  await wmill.requestInteractiveTeamsApproval({
    teamName: "Team A",
    channelName: "General",
    message: "Please approve this request"
  })

  // Send approval request to team B
  await wmill.requestInteractiveTeamsApproval({
    teamName: "Team B",
    channelName: "General",
    message: "Please approve this request"
  })
}
For more details on approval steps and their features, check out the Approval steps documentation.
Action on Teams from Windmill
Write to Teams from Windmill
The second way to make Teams and Windmill interact is through scripts triggered from Windmill to the Teams API. In other words, our goal here is to allow Windmill Scripts acting on Teams on your behalf.
Let's navigate to the Resources page and click "Add a resource/API".
You can read more about Resources in the documentation here.
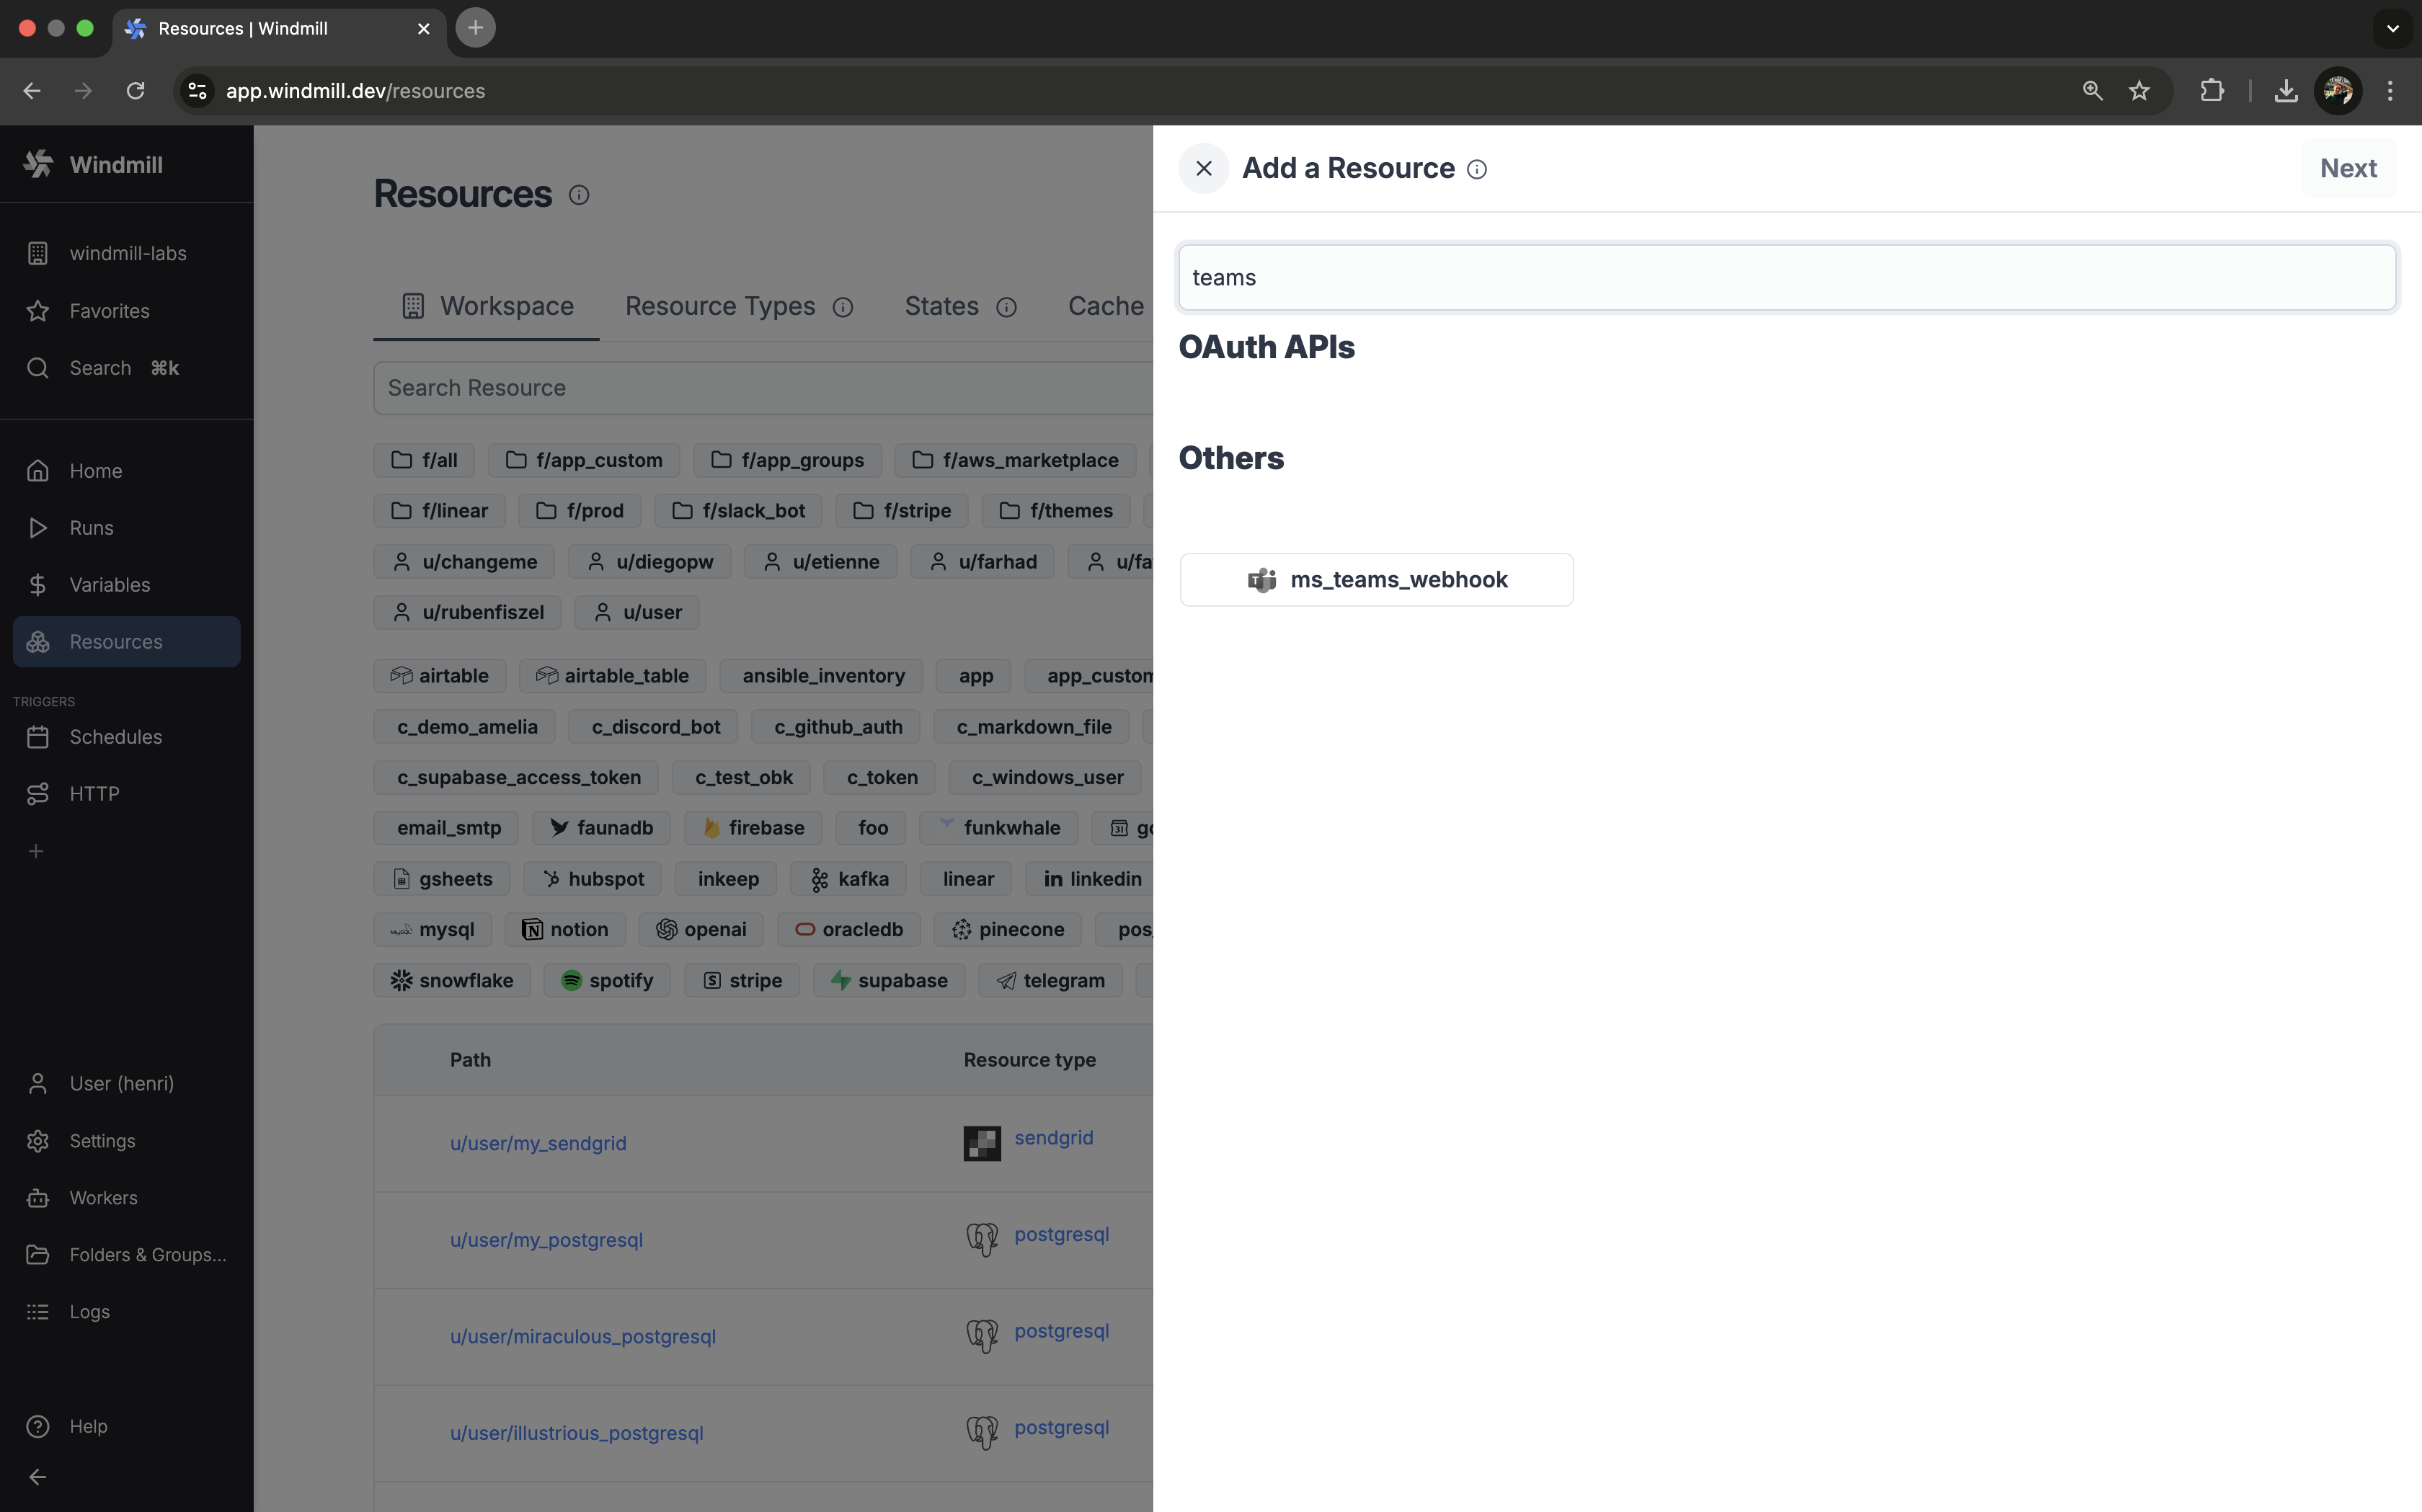
Select the ms_teams_webhook Resource Type from the resources list and add a webhook_url (see Teams docs for details on how to create a webhook).
You can then use the resource in a script, like this script found on WindmillHub that "Sends a message to MS Teams channel via webhook":
import { IncomingWebhook } from "npm:ms-teams-webhook@2.0.2";

// See below for an example card you can pass in

type MsTeamsWebhook = {
  webhook_url: string;
};
export async function main(
  ms_teams_webhook: MsTeamsWebhook,
  messageCard: object,
) {
  const webhook = new IncomingWebhook(ms_teams_webhook.webhook_url);
  const ret = await webhook.send(messageCard);
  return ret;
}

const example_card = {
  "@type": "MessageCard",
  "@context": "https://schema.org/extensions",
  summary: "This is a test summary",
  themeColor: "0078D7",
  title: "This is a test title",
  sections: [
    {
      activityTitle: "Windmill Webhook",
      activitySubtitle: "2023-05-25 17:57:55",
      activityImage:
        "https://connectorsdemo.azurewebsites.net/images/MSC12_Oscar_002.jpg",
      text: "This is a test text",
    },
  ],
};
Error handlers
Microsoft Teams is an efficient way to be notified of errors on a Windmill run, whole workspace or instance. Windmill provides an integration for error / success / recovery handling on Microsoft Teams.
More details on Error handling page.
Critical alerts
Microsoft Teams can be used to receive critical alerts from Windmill. This feature is available in the Enterprise Edition.
Critical alerts are generated under the following conditions:
- Job is re-run after a crash
- License key does not renew
- Workspace error handler fails
- Number of running workers in a group falls below a specified threshold
- Number of jobs waiting in queue is above a threshold for more than a specified amount of time
To set up critical alerts to Microsoft Teams:
- Configure SMTP in the instance settings
- Connect your instance to Microsoft Teams in the instance settings
- Specify the Teams channel where alerts should be sent
You can also set up worker group-specific alerts to receive notifications when the number of running workers in a group falls below a specified threshold. This can be configured in the worker group config.
Instance-wide critical alerts are only visible to users with the superadmin or devops roles. For workspace-specific alerts, users need to have admin privilege over that workspace.